Day: carnival
Ideas for carnival 2012: fatal beauty !
by Stefano on Jan.30, 2012, during Body Painting, Events, Make Up

Here is a proposal to make up for Carnival: fatal beauty!
As you can see from the photos, it's a trick asymmetric, where the right side of the face was made up with make-up rather marked beuaty, accentuating the light and shade of makeup on the eyelids and under the cheekbones, I realized while on the left face-painting of a skull with colored water.
Before you begin face painting, I covered the eyebrow with soap, to do it then disappeared under makeup.
To draw the skull I was inspired by a couple of pictures downloaded from the Internet (specifically from wikipedia, that).
The realization of face painting:
With the black color and a thin brush I have updated the guidelines that define eye, nose, mandible and maxilla, and the various teeth, helping with the feel and trying to follow the underlying bone.
Then I mixed white, yellow and a touch of black, for the typical color of the bones, preferring a shade a little’ darker, so that we can build on later, and chiaroscuro shadings.
I colored with white teeth, and nose, eye and the inner side of the square jaw with black, I also used to mark the boundary face.
Finally I created using the black shades and a big brush and almost dry, bringing into the dark inner points and using the white to create fake reflections (For example, on the forehead, cheekbone and the center of the nose) in the most obvious; and I added some detail with the brush nice and simple (a crack on the nose and under the eye).
Ideas for Carnival 2011: Cat – Cat MakeUp Tutorial
by Stefano on Mar.03, 2011, during Body Painting, Events, Make Up
Republish this old guide on how to make a nice makeup feline, always in vogue for those who want to deal with a little carnival’ of joy. E’ You can also change the colors proposed (blue and blue, Pink and rosso) to give the mask a touch of originality !

First of all applied with a sponge, a white light enough on the face (I used the acquacolor) , including the eye, and softening the neck. Then start drawing with the black nose cone, as shown, about respecting the limits given by the vertical line of the eyes and ears of the mid face (red lines).
The mark must be decisive and firm, starting off from the edges of the mouth to get thin and faded face up to the half way line.
 |
 |
E’ important to taking a nose-shaped inverted triangle, the upper lip and a double curve, typical facial feline. In the rest of the face I made a trick based on triangles and curves, to remember a bit’ the stripes of the coat brindle.
 |
 |
In this case, to remember the effect of the hair, I left the poorly defined bodi, created with many small irregular pennellatine.
 |
 |
Finally I marked with a white nose and chin more cargo, I called contornadoli black eyes and stretching a bit’ out, and I scored a mustache with many small dots blacks.
Another effect you can give with sponge (little!) gray / black part of the face remained between the white stripes; This will help to create chiaroscuro effects and make the most basic trick of living.
Accessories such as ear, vampire teeth and colored contact lenses with the eye of the cat will make the mask even more attractive ! =)
Zombie Make Up Tutorial – How to Become a Zombie !
by Stefano on Feb.23, 2011, during Special Effects, Events, Make Up
As promised a few days ago, here are some simple steps to achieve in a short time and with materials readily available from a nice trick Zombie, On the subject saw the carnival imminent or partner if you want to remove some’ troppo assillanti 🙂
Materials needed:
- White base for facepainting (excellent even in the clown makeup cream)
- Black pencil make-up
- Color fire red (well only a lipstick)
- Pre-vulcanized liquid latex (alternatively a layer of toilet paper and PVA glue)
- possibly a correction / economic foundation
How to proceed:
Apply with a sponge in the liquid latex to the cheeks and make it dry using a hair dryer. In the event that you do not have the latex (mesticheria or sell it in stores a few colors €) can be done as follows:
Separated by a piece of toilet paper (or a paper towel) two-ply, tear so that it follows an approximate outline of the cheeks (you could get two more or less oval) and paste to the face, one cheek, using PVA glue as a bonding agent diluted in a bit’ d’acqua, being careful to apply the glue to the side of oval, and not in the middle.
 |
 |
When finished you can proceed to slightly whiten his face, as the most preferred white forehead, the nose and cheekbones.
 |
 |
Apply now some’ black eyes: over the entire upper eyelid and lower eyelid, surrounding the whole eye.
Wait for it to dry out a bit’ (in case you're using water colors) then mix it with a bit’ sfumatelo on lipstick and white: the objective is to achieve a dark purple.
 |
 |
Now, with a pencil or black color on the cheeks create a chiaroscuro: the goal is to give an idea of emptying, then you can proceed to break the latex or toilet paper in vertical strips, coloring the underlying skin with red lipstick, To give an idea of the flesh.
 |
 |
Finally, color the tip of the nose and lips with black.
If you're using a pencil ol'eyeliner can score some interesting cross line, thin lips, not too long, giving the idea of a lip that is breaking.
 |
 |
The concealer or the foundation may be useful at this point if we realize that we have exaggerated with the white or black and white will fade further (apply it to lighten the black, then fade to white).
If we want to add some more details, We can draw two parallel lines on the forehead and round, by then fade out, to give an idea of the passage of a large vein or the skin is breaking.
 |
 |
A red halo around the mouth and stains like blood spatter made will make it more gruesome and terrifying your creation..
Neck and hand colored the same color of the face , and uncombed hair properly and fixed with a bit’ spray or foam to make you worthy of revival from death …
Concorso 'Dracula's stronger than death Love’ per ‘Make Up Forever’
by Stefano on Dec.20, 2010, during Beauty, Events, Make Up
 |
 |
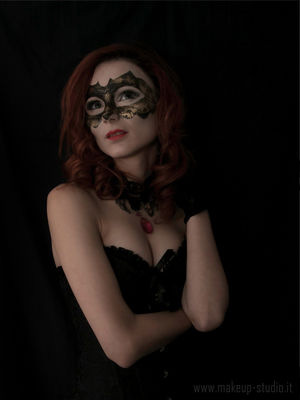
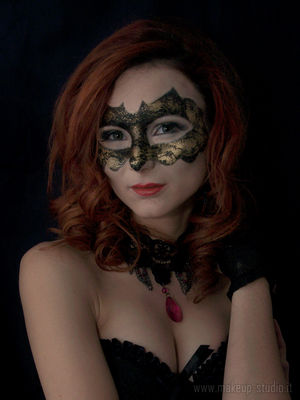
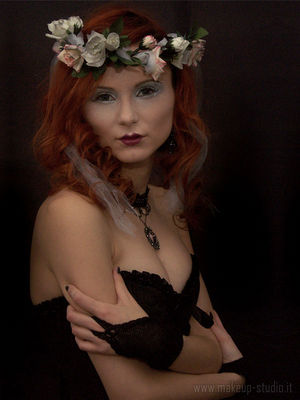
The theme of vampires has always fascinated me, and, having happened almost by accident before my eyes This contest, organized by Make Up Forever on the new theater 'Dracula's stronger than death Love’ I decided to participate.
I had no doubts when looking for a hero to the photo shoot, treated with great professionalism by Lorenzo Fontanesi and Mariasole, I knew from the beginning Francesca B., with his passion for the Gothic and his red hair 'Lucy', would have made my case.
A Saturday afternoon spent at home, color with dirty hands and a desire to recreate the atmosphere and a bit gothic’ cup.. typical of dusk, indefinite time between the day and the night creatures day and night meet, undefined as the distance that exists between death and life.
 |
 |
Cornus devil latex
by Stefano on Feb.22, 2010, during Special Effects
Today I'll show how to achieve simplicity with a small pair of devil horns in the pre-vulcanized liquid latex.
Necessary:
- Clay modeling (I use the Pongo, cheaper and readily available)
- Gypsum powder (if we do not want a particularly precise and richly detailed plaster and it is also by those who sell items for construction will be fine)
- Vaseline (available from hardware)
- Pre-vulcanized liquid latex (in this case I chose cheap material available in a shop of fine arts)
- A container that can accommodate our model the size of just over (achievable in Caroncini or simply by cutting a plastic bottle)
Once identified by eye the size of our model (a horn in this case) we start the modeling phase with Pongo, placed on a flat base isolated from the work table with a sheet of paper, trying to give a rounded shape and concave at the base.
 Obtained the desired shape, and added some detail to increase the realism (For example, vertical stripes on the bone or the horn in a simple orange peel on the skin) you must place the model in a suitable container (which may be a small cardboard box made to measure or, as in my case, the bottom of a plastic bottle), up at least a few centimeters more than the model, and distribute on the surface in a delicate (preferably with a brush) the vaseline will work to release.
After that you can make the plaster and fill the container that, until it completely covers our model (that, course will remain open at the base (face which touches the bottom of the box or bottle) and not be undercut, permetterene for rapid and effective removal.
Once you have the mold (the negative) will be sufficient:
- apply a thin layer of vaseline
- stratification 3/4 levels of pre-vulcanized liquid latex, buffered with talcum powder from time to time, when dry
to create many replicas of our model.
To get a good result the Board to pay small amounts at a time of latex into the mold, mold to be rotated so that the liquid latex adheres well to the boundary. To speed up the drying time may exercise useful to have a hair dryer, to be used at low speeds and at a distance of at least 10/15 inches from the mold.
The outer rim is the most delicate part of the work: more will be thin more 'invisible’ will be the application of the prosthesis. To achieve this it is usually sufficient to reduce a layer of latex outer part, remaining inner layers with subsequent.
Tips and masks for carnival
by Stefano on Feb.12, 2010, during Events
E’ now reached the carnival and we have not yet thought about what mask to wear for a nice evening with friends in the disco ? Or more simply.. after years of serious denial, and we decided to return children to celebrate for one evening with his face painted ? So why not try to pull off our artistic side and make a facepainting for a night when no one is who seems…
Making a facepaint is something within reach of anyone with a bit’ patience, material and an hour of time to spare.
The material:
- a white makeup pencil
- a black makeup pencil
- colors for the face-based water that you can find stores that sell items for the carnival, or supermarkets
- a sponge triangular lattice, which is sometimes also provided with the colors.
- accessories to enrich the trick that you have chosen, as false eyelashes, colored wigs and glitter.
After cleaning the face, preferably with a makeup remover, we can start to play with the white pencil drawing that we have chosen. The white pencil will be easier to remove than black and not make a mess in the case of corrections.
If you want a little manual or simply to take the first, you can print and cut out one of the designs you find below, and play along the edges.
It is therefore necessary that the picture occupies the entire face, but rather that it maintains the proportions.
Once we are happy with what we have done, using the black pencil, with a sudden strong and determined, and disclose it outlines the basic design of the mask.
Then, wetting the sponge first and passing it on waffles color, Then inside of the lines marked with a pencil, go to color patterned our design.
All done ? Tigrotto and gattino.. we are ready to quit !
 |
 |
 |
 |


